Friday, March 29, 2013

I Tried to Resist!


Every time my friend Denise brings something to a meeting in one of her adorable little fabric baskets, 
I have basket envy. 
I've told myself over and over that I don't need one of them no matter how cute they are, 
but....well, you know.

These would make really fun little Easter baskets,
or you can use them for lots of other stuff like I did! 

My first attempt using American Jane scraps.
Perfect for holding a charm pack and pattern.
Charm pack and pattern from Sandy Gervais
I won them in drawing on her blog.
Well, that was fun--so..I made another without the pieced section.
Can you believe this Anna Griffin fabric is in the clearance area at Colorz?
I think it's SEW cute! 
Perfect for holding some hexie tools.
Well, then I had to use up what's left of the two fat quarters I used for the second basket.
I managed to squeeze out two more by simplifying the pattern even more and making them a bit smaller.
Perfect for sorting some selvages. 
Yes, I hoard those too.
I followed the tutorial at the Pink Penguin HERE. Once you get the hang of them, you can whip one out in about ten minutes (not counting the whip stitching on the inside to close the opening for turning).

Tuesday, March 26, 2013

You Might Remember This


Grandmother's Choice Block 30 Broad Arrow
This was my first version.
Barbara had this one listed as an alternate option. I think it's a lot more fun!

You may remember my Easy Street fiasco and the pile of brown triangles I removed from the quilt top and then decided I would pair up with squares from my scrap box. After moving them around on my cutting table for several weeks, it was time to sit down and sew!

I ended up with 128 Half Square Triangles.
This setting uses 120.
Whoa! It sure gets small when you sew these guys together!
I thought I would use the eight leftover HST's at the corners in the border....
...but decided I liked them this way better to extend the points.
I hand quilted in concentric lines in the fold of the triangles extending through the border.
I decided to use a scrappy binding.
 Yeah, I have a box of binding scraps, too. 
I really like the way the colors sparkle against the browns.
I'm glad I didn't throw those brown triangles away! 

Saturday, March 23, 2013

March Madness/Show and Tell

I'm not a sports fan in any way, shape or form, but I have to brag on my niece Brooke a little bit. She is on the cover of Sports Illustrated this week. She's a member of the Kansas University Rock Chalk Dancers.
My niece Brooke is directly under the P in Sports!

Check out the Kansas U dance roster. If you watch the slide show on the left hand of the Rock Chalk page, sooner or later Brooke will come up doing a leap(maybe there is a special name for that form of contortion?).  Oh, to be young and flexible again....

Okay, back to our regular programming:
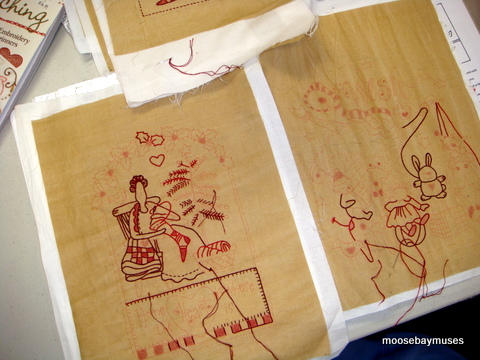
Here are the photos I promised from Monday's Stitch Therapy meeting. 

This little bird nest was redrawn so the little bird doesn't fall out of the nest.
(see the abandoned embroidery on the right)
When she gets bored, she starts a different block!
I really like the way this charcoal embroidery looks. 
I had to share this cute little quilt that Jeanne made for Jean
using the hexie flower we learned to do last year in Stitch Therapy--adorable!

Cute little button embellishments!
Lots of progress here!
The French General fabric is perfect.
Lots of shading with the variegated red floss.
Ellie was doing some tracing onto a really pretty background.
I think the tinting makes this version look so vintage!
So cute!
Touches of other colors here too.
Merrily brought this cube quilt she made for a gift--awesome!
Her husband will be quilting it.


Wednesday, March 20, 2013

Easy Applique Stars (mini) Tutorial

Monday was the monthly Stitch Therapy meeting for March and we had a pretty good turn-out despite the snowy road conditions. I have lots of fun photos of Wish Quilt progress coming up later this week.


The Wish Quilt has quite a few star appliques sprinkled around. In Bronwyn's instructions, she tells you how the make the stars into little pockets to hold tiny "wish" notes or candy treats. By now, you know I was pretty lazy when it came to this project, so it shouldn't surprise you that there was no way I was going to make pockets! My stars are appliqued all the way around and then I embroidered some "wish" words on them instead of personalizing the quilt with family names.

My "wish" words: Love, Joy, Hope, Faith, Grace, and Peace.  

On Monday I did a little demo on how I appliqued the stars using the "starch method". It's a turned edge applique, but not "needle turned", so there is some preparation. If you are new to applique or don't do it that much, this method gives you great results and isn't difficult at all. 

I made a template by tracing my star onto freezer paper. Then I ironed the freezer paper to a second piece of freezer paper and cut out my star. I use C. Jenkins freezer paper--it's a bit heavier than grocery store freezer paper, so you have a strong template to press against--almost like tag board. If your template points are bending inward as you starch and press, you may need to add a third layer of freezer paper. 
Press the freezer paper template to the wrong side of the fabric. Cut out the star shape from the fabric, leaving a scant quarter inch seam allowance. Clip into the "inside" of each star point almost to the template (leave a few threads to prevent raveling).
Now you are ready to paint on some starch. I use Faultless Heavy Starch in the spray can from Walmart.
You could mix your own heavy starch using Sta-Flo in a 50/50 ratio.
FYI: Best Press is not the best choice for this method.
Apply the starch to the seam allowance where it will be folded to the back. Don't worry about tucking in the star points, but pay attention to the direction you press them--see below: 


After pressing the fabric until the starch is dried, you can carefully remove the freezer paper template and attach your applique to your background. I use basting glue (like Jilily or Roxanne's) for attaching my starched appliques to the background. The little applique pins drive me crazy as I am always snagging my thread on them.

I am right handed and I do my applique in a counter clockwise motion. Notice that my extra fabric at the points is pointing to what would be my left as I sew around the star. This way, as I sew up the right side of the star, I have the point secured into place before I try to shove the excess fabric under the applique. The fabric I'm tucking in can't come out the other side of the point since that side is already sewn in place. Taking a couple of tiny stitches right at the tip helps to really hold it in place also, and makes it easy to manipulate that little flap of fabric to where you want it to be. If it's hard to get it moved underneath with your needle, try a toothpick. Sometime I need to use the tip of my embroidery scissor to carefully maneuver the fabric under to point.
If there's a lot of fabric hanging out there, trim it away, being careful not to cut it too close at the tip or you may end up with a raveled mess. The right star point above has been trimmed to about an eighth of an inch . The star point at the top has not been trimmed yet and the point on the left has been sewn down.

By the way, these aren't Wish Quilt stars.
I am embarrassed to confess that I finally got sucked into Barbara Brackman's Dixie Diary block of the month that you can read about here. And since I couldn't decide if I should put a star or a heart on the monthly block, I am doing two eight inch blocks each month so I can do a star AND a heart--yeesh! Yes, I do need help!!

January through March Dixie Diary blocks using Jo Morton's Alexandia fabrics. 


Sunday, March 17, 2013

Weekly Progress

I'm thrilled that I completed my Number Nine this week!
Kim Diehl Table Runner--hand quilted and bound!

 I also got a few other things done on some continuing projects.

Grandmother's Choice Sew Along
Block 28: Ocean Waves
Block 29: Seven Pointed Star
I know Barbara was feeling a little devilish when she decided we should do this block! 

Eight blocks for the second row of Leesburg quilt

Now I'm ready for the next number to be chosen in Connie's Game

Saturday, March 16, 2013

More Stitch Therapy!

This is as close as I will be able to get to a hollyhock for a long time! 
This coming Monday will be our third Stitch Therapy meeting. I'm so excited to see what everyone has been doing--this is one creative group!! I'm not sure how many years I have been doing this group, but it has been a lot of fun working on different projects and sharing laughs. One year we had a "trunk show" of some of  our member's beautiful projects.

My Winter Wonderland is on the left and my Over the River (still not quilted) is on the right.
I'm not sure what year we had this little show. 

I love Dawn's version of Winter Wonderland with the checkerboard border!
I can't believe I didn't take a close-up photo of the gorgeous basket quilt hanging on the right. 

This is a closer look at Dawn's Winter Wonderland.
She did it in multi-colors on a tan background.
Isn't it fun?
She came up with her own setting too--very cozy!
Wish this photo was better.  
Someone brought in their Over the River to show us--done all in blues--love it!
I looks pretty good with my Winter Wonderland...hmmm....
I don't remember who did this beautiful red work quilt.
So pretty and classic! 
Bunny does this lovely Brazilian embroidery.
The flowers are all three-dimensional and look so real!
She added clear crystal beads to look like snow on the branches
 and red ones for holly berries.

The threads she uses are rayon and have a rich sheen. 
We had lots of embroidered pillows--so pretty! 
Teensy yoyos!
If you haven't done embroidery before or need a refresher lesson, join our Stitch Therapy group at Colorz--it's not too late! Or, if you can't get there, there is an awesome on-line resource at Mary Corbet's Needle 'n Thread website. She has made videos demonstrating tons of stitches that you can watch over and over! Watch the Stitch videos HERE.