Thursday, December 11, 2014

Scrappy Patches

A while back Lori of Humble Quilts had a sew along for an adorable little quilt. She has had several sew along's and you can see some of them here.
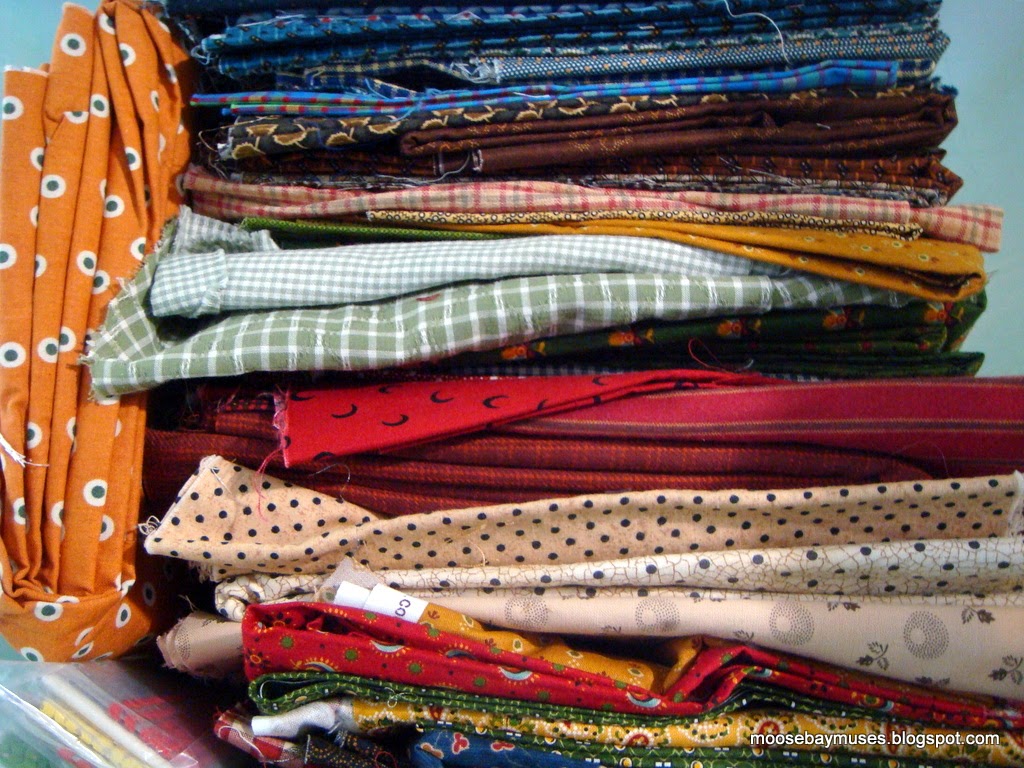
I went so far as to get out my boxes of squares...these are the 2.5"

These are the rest that measure under 5"--there's a layer of 1.5"squares in the bottom


Well, I never got around to starting Lori's little mystery, but one morning I saw THIS BLOCK on Lori Holt's blog.
Since I have a plethora of 1.5" squares I decided to try it out with my scraps in a smaller size. 

Yes, that mess above is just these 2 components (x8) laid out on my block board to make one Crossroads block.

Using my medium/dark 1.5" squares and 2.5' light squares, my block is half the size of Lori's.
It finishes at 8"and I think it's pretty cute!

I cooked up a couple layouts in EQ7 using a straight set (35 blocks) and on point (32 blocks).
They both finish at just about the same size--I'm leaning toward the straight set on the left
.

Linking up to Scraptastic Tuesday HERE
Scraptastic Tuesday

Tuesday, December 9, 2014

How Does Your Garden Grow???

How Does Your Garden Grow applique and patchwork quilt by Norma Whaley
A few weeks ago, I won a chance to choose a pattern from Timeless Traditions.
 Norma has so many sweet patterns and it was very hard to decide, but I have loved "How Does Your Garden Grow" ever since she showed sneak peeks of it on her blog. I knew her pattern for "Silent Night" would be in the current issue of Simply Vintage and her "Woodland Tree Skirt" is in Quiltmania this month too, so.... "How Does Your Garden Grow" was it!
I was so excited when the pattern came in the mail!
 I just had to make the strip sets right away and cut the applique background triangles from my little stash of Aged Canvas. 
Those wrinkles and variations in color are all dyed into the fabric--the triangles are actually pressed perfectly flat.

I was so excited, I couldn't stop myself from setting up a few of the wool applique blocks, even though I should be working on finishing at least one of my UFO's for December...and then there are always my wool hexies to stitch.....

okay...I lied...I set up ALL the blocks...my bad...!

So instead of finishing a UFO, I have started a new one--ack.
Good bye "How Does Your Garden Grow"--I'm putting you away in an Art-Bin.
See you in the Spring!
You can see a few variations of How Does Your Garden Grow HERE

Sunday, December 7, 2014

A Few Little Finishes...

I've added a few more wool hexagons to the DONE pile:
Baby Jesus

Santa

Candy Cane

Gingerbread Man

Christmas Stocking

Santa's Helper

My Temecula Quilt Company Little Letter's is quilted and bound.

I used my Clam Shell ruler and 50 wt. Aurifil thread color #2310.

And since a quilt isn't really finished until it has a label, I will be stitching this today.

Linking up to Slow Sunday Stitching at Kathy's Quillts
Slow Sunday Stitching

Tuesday, December 2, 2014

A Little "Favorite Things" Tutorial

Thank goodness I sometimes write myself notes--even better if I remember to read them! 
I turned my appointment book to December yesterday and had written a reminder to bring along a "favorite item" to exchange at the Stitching Society meeting this Thursday. ACK!
It's easy to pick my favorite thing to do--stitching!
One thing I can't do without while enjoying my favorite activity, is my little thread catcher. So, I guess it is one of my favorite things! I take it with me everywhere I do stitching and those little snippets from embroidering or binding or whatever go into my little catcher. It squashes down into almost nothing and can be easily tucked into a small take along bag. No more bits of thread all over the car interior or your friends living room furniture!

You can make your own in a snap!
 If you have a 10" 60 degree ruler, you have the pattern.
Otherwise, you need an equilateral triangle--most any size will do, but not too little.

After cutting out your triangles, (you need two per thread-catcher, an inside and an outside) mark each corner using a spool as a guide.

Carefully trim the corners on the marked lines at each corner.
Layer the inside and outside fabrics right sides together.
  •  Note that each of the triangles should have one side that has been cut on the straight of grain. Make sure both triangles are aligned with the straight of grain together. 
Now sew all around, leaving a 3"-4" opening on the straight of grain side of the layered triangles.

After sewing all around (careful sewing around those corners will make prettier points when turned!), use your point turner to smooth the seams. See how nice the opening folds in where you left it un-sewn  on the straight of grain?
You're welcome!
No need to sew that opening up--it will be taken care of in the next step!

Now  match the points with the inside fabric to the inside.
Pin at about the center distance from the fold to the point.


Do that on all three sides.
See my folded in seams--those will be sewn shut now!

Sew from the fold to the pin marker using a generous 1/8" seam, back stitching at both ends.
This is what you will get.

Now you can tack the points down with beads, buttons, yo-yo's or what ever you desire.
Make it cute!
I like to tie buttons on with floss using a square knot--then there is only a tiny stitch on the inside.

I added wool balls to my pin cushion--is it weird?

I couldn't remember if we are supposed to bring this "favorite" something for everyone (it's not a big group) or if we are exchanging gifts one on one.
I guess I should have written myself a more detailed note!
So I made a pile of thread catchers.

Of course, as I do my favorite thing--stitching--I always have either hot or cold tea nearby.
 And occasionally a piece of dark chocolate is necessary--especially with salted caramel--so that will be added to the gift package too!


Sunday, November 30, 2014

My Happy Rick Rack Block and Novembers UFO finish!

We had two choices to work on in the Karen K. Stone class, Happy Rick Rack and Cactus Flower. Obviously I was going to do Happy Rick Rack--do you see the hexagons???
Happy Rick Rack

Cactus Flower

Here are both projects in person--sorry I didn't get more of Cactus Flower--you can tell where my interest lies....!

Karen has added some cool quilting and embellishments since the original photo was taken.
A lot of the quilting is bobbin work and done from the back of the quilt.
Karen called it her "60's" quilt--there are little embroidered daisies strewn through the border that were inspired by the daisy print she chose for the backing. 

Since I had such short notice, it was a scramble to choose fabrics to take to class.
 Because of the type of quilts Karen does, my first instinct was to take along my "funky" fabrics I've been collecting for my Steam-punk and Fractured quilts.
 In the end, and after reading that she felt you could use any style of fabrics for Happy Rick Rack, I pulled out some of my brighter Jo Morton fabrics and threw in a few dots and checks.

This is the block I managed to finish in class--quite a challenge for a non-paper piecer.
We cut our paper block patterns into spirals, pieced them and then sewed them back together.
Only 31 more to go to make the top!

This is the beginning of  Sharyn's block for Cactus Flower.
 I love all the black prints with the brights and her fussy cut center! 

Today I will be doing some Slow Sunday Stitching and linking up at Kathy's Quilts.
This is my UFO finish for November--I quilted it yesterday and will be binding today.
I think for December's UFO finish I will dig down to the bottom of the tub and bring out an oldie!

Friday, November 28, 2014

More From Karen Stone

I hope you had a wonderful Thanksgiving!
We are doing our family celebration today--looking forward to that turkey! 
Temecula Quilt Company posted the last three Little Letters--so cute! I still need to sew up the sashing--already finished the cutting, so it shouldn't take too long.

In my last post I showed some details from Karen K. Stone's finished quilts that she shared with us in class. Today I have some detail photos of some "works in progress". 
This is all linen and uses her English paper piecing by machine technique.

Silk hexagons-- and again, English paper piecing by machine.

I love the combination of textures in this one--and more English paper piecing by machine.

Machine applique using all silk--gorgeous!

This is my very favorite--I can only imagine how wonderful it will look after Karen quilts it!

I'm not sure if it's the colors or all those circles that makes me love it!
More next time!
I'm determined to just collect the patterns for Bonnie Hunter's Grand Illusion Mystery Sew Along--I still have 2 unfinished mysteries: my Christmas Solstice and Easy Street, so I don't need a third one! I'll just watch from the side lines as photos are posted, and drool.

Wednesday, November 26, 2014

Amazing Monday!

On opportunity to take a class from Karen K. Stone this Monday fell into my lap last Friday (thanks Susie!) and I am so thrilled that I was able to do it. 
You probably are aware that Karen is the Queen of the New York Beauty block and you can see a lot of her quilts on Pinterest--a good board is HERE 

I will show what we actually worked on in class another day, but today I wanted to share some little peeks at some of her work. 
Her creativity and workmanship is amazing! 
This is a detail from her latest ribbon winning quilt.
The diamonds were English paper pieced by machine--a technique that she will be detailing in an upcoming book.
You can see the whole quilt HERE
Reptile Wisdom: First Place Traditional Pieced

The double points on this one she accomplished by "tucking" in fabrics.
I'm not sure how that works, but it is stunning!

Reverse applique by machine.

Raw edge applique leaves with ribbon stems.

I love these clam shells.

More reverse applique (upper left) and fun quilting. The double binding is cool too.
She does all her fun quilting on a domestic machine. 
I don't want to overload a post with too many photos, so this is to be continued........